Thursday, June 11, 2015

Porcupines in a Skillet

A lot of people I'm sure have heard of Porcupine Meatballs. For those of you who have no idea what they are I'll explain. Basically, you make up your meat ball mixture and add uncooked rice to it. As the meatballs cook the rice pokes out a little sort of like porcupine quills. They are super delicious and one of my favorite "comfort food" type dishes. The only problem with them is they take so long to make and cook. Sometimes you just need a quick, filling, and delicious supper. Here is a quick and easy version!! 


Note: All ingredients can be adjusted to your family's size. I make a lot because I have three boys who have hollow legs!! haha Plus, we love leftovers!!

Porcupines in a Skillet
1-2lbs Ground Beef or Turkey 
1 pkg. Onion Soup Mix
1 14.5oz Tomato Sauce
1 15 oz Can Diced Tomatoes
2 Cups Water
1 Cup Rice (not Minute Rice)
1 Head of Cabbage (Optional)


In a large skillet brown ground beef until completely cooked through. Drain off any grease. Next add Onion Soup Mix, Tomato Sauce, and Diced Tomatoes. Mix well. Lastly add Water and Rice. Cook on Medium Low Heat until Rice is tender. Serve alone or over cooked cabbage.

If you like cabbage I highly recommend it!! It is perfect with this meal. I also suggest you stay close to the stove and stir often. 

If you would like to see my video demonstration watch this video!!


Eat Well,

Emily-TheCountryCook on YouTube

Monday, May 4, 2015

Simple Lemon Bars

It's spring, and with spring comes green grass, blue skies, beautiful flowers, and the promise of sunny days. It also brings along my craving for all things lemon. Not just mine, but my families too!! Each year around this time and all through the summer I make Lemon Bars. They are a sweet treat that everyone in my family loves. They still have a certain tartness that mixes with the sweet to make a perfect, refreshing dessert that's great to serve at cookouts, picnics, church dinners, anytime!! Here's how to make these lovely little goodies.


Preheat oven to 350 degrees. Line 9x13 pan with parchment paper leaving some hang over each edge. That makes it so much easier to get the bars out of the baking dish.

Crust: In a large bowl, blend butter, confectioners sugar and salt until well combined and smooth. Stir in flour until blended. Scrape into the prepared baking pan and press evenly into the bottom. 

Bake at 350 degrees F for 20 minutes or until crust is golden brown. Remove from oven and set aside. 

Filling: In a large bowl, beat granulated sugar, flour, eggs and lemon juice until completely smooth. Pour over crust. 

Bake at 350 degrees F for 25 minutes or until no imprint remains in the filling when lightly touched in the center. Remove from oven to a wire rack and cool completely. After cool remove bars from baking dish and place on a flat surface. Dust lightly with confectioners sugar. Cut into 24 bars and serve. 


That's it!! Simple and delicious. The crust is like a short bread and the filling is a lot like lemon meringue pie. If you would like to watch my video demonstration, I'll have it posted below!!

God Bless,
Emily-TheCountryCook


Friday, January 2, 2015

Chocolate Chip Cookies

Hi everyone,

   I'm so excited!! I received money for Christmas and was able to buy myself a new camera!! I've been needing one for several months now but just never had the money to invest in a good one. My husband came across the Samsung Galaxy camera one night and I went straight to YouTube to watch some reviews. I fell in love and knew this would be the camera for me. I'll do a more in-depth review on the camera in a few weeks but so far I have to say it's the best camera I've ever owned. *Side Note* Please excuse the yellow cast on my pictures. I'm still trying to play around with the settings and lighting. 

 Now, onto the cookies. Yesterday I got a craving for Chocolate Chip Cookies. I decided to try out my camera for a blog post. These cookies are so easy to make and super delicious!!

In a large bowl beat 1 Cup of butter until light and fluffy. I have found the longer you beat the butter the more light and fluffy the cookies will be.


Beat in 1 Cup packed Brown Sugar


                                            1/2 tsp. Baking Soda


                                           1/2 Cup Granulated Sugar


                                         Beat until Light and Fluffy


                                       Next add 1 tsp. Vanilla Extract


                                               And two Eggs


                                              Beat well to combine


                      Finally beat in 2 1/2 Cups All Purpose Flour a little
                      at a time until just combined. You may want to stir 
                      it in by hand for the last addition you add.


                      Last but certainly not least, the chocolate!! Fold in
                      Two Cups of Chocolate Chips. You can also add 
                                      Walnuts if you so desire.


               Place Cookie Dough on parchment lined cookie sheet
             and bake for 9-11 minutes depending on size of cookies.


I hope you all enjoyed this recipe!! Please let me know if you've tried it and how well you like them.

Eat Well,
Emily

Thursday, September 11, 2014

Homemade Applesauce Perfect for Fall!!

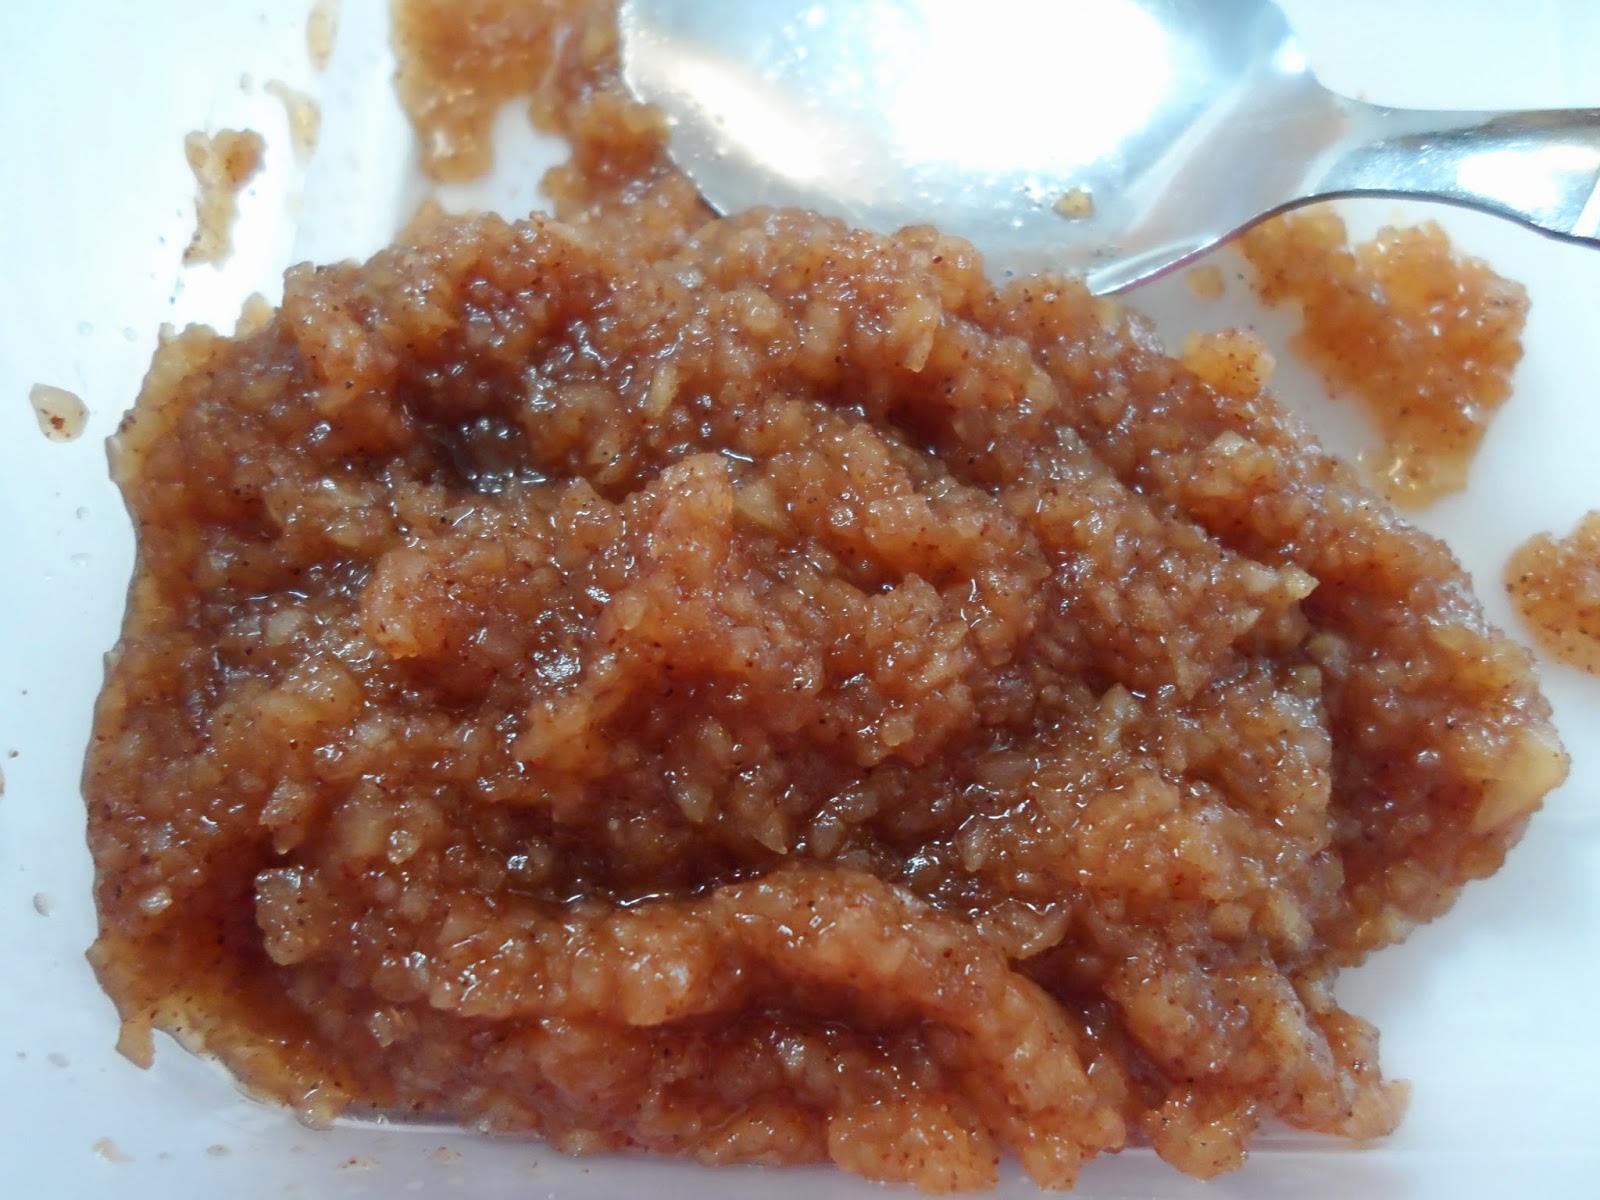
Ahhhhh Fall. I can see you in the distance, but the weather here in Southern Ohio has been anything but fall like. Still, this time of year makes me so excited for the coming season. Fall is hands down my favorite. I love to find and create new recipes from all the harvest fruits and veggies!! This year I've received an abundance of apples from my grandparents. They visit a local apple orchard quite often and they know how much my boys, (and I) love apples. This past week they brought us a 1/2 peck of Gala apples. I thought it would be a great idea to make some applesauce. I haven't made any for several years and I knew my boys would love it. So, that's just what I did!! In fact, they loved it so much it was gone within a few days and I've already been requested to make some more!! I love it when that happens!! This recipe is super quick and easy, but at the same time oh-so-delicious!! I won't say how I know this, but it's especially good warm on a hot biscuit with melted butter!! ;) So, here's how you make it!!

First thing you need is a lot of apples. Or, just a few. It all depends on how much applesauce you want to make. In my case I'm using 9 apples. The last time I used six and that just wasn't nearly enough.


Next, peel, core, slice apples fairly thin, and add them to your pot.

Add about a cup of water to your pan. You can also use Apple Cider or Apple Juice!!

Next up is the Brown Sugar. I love using brown sugar over white sugar. It just gives the applesauce extra warmth and I love the color as well!! I used 1/2 cup, but you can use more or less.
Awww look!! A brown sugar cupcake!! ;)

Next is the spice. I love, love, LOVE Cinnamon so that's what I use. Honestly, I didn't even measure. I'd say a good tablespoon....... or two. Whatever spice you like feel free to add it. After all, you are the boss of your applesauce. :) 

Let it cook on low for about 20 minutes, or until the apples are soft and tender.

Next thing you'll want to do, which I totally didn't take a picture of, is dump all of this into a food processor. I let mine sit for a few minutes to cool down before I processed it though. Then blend to whatever consistency you like. 


That's it!! Quick, easy, and perfect for Fall!! Oh and by the way, I'm pretty sure this will be served in Heaven over a hot, buttery, biscuit!! ha ha ha


Hope you give this recipe a try. If you do let me know how you liked it!! Have a great day!!

God Bless,
Emily


Check out my video!!


Thursday, August 14, 2014

Product Review: Chobani Greek Yogurt.

Hey y'all,

The last few weeks I have become OBSESSED with Chobani Greek Yogurt. Compared to other greek yogurts on the market this is, in my opinion, the best!! Please watch my video for the full review. Also, if you like what you see subscribe for more videos!! I have a little of everything on my channel. From product reviews to cooking with my kids!! Would love to have you all as part of my little YouTube Family!!

xx,
Emily


Thursday, May 1, 2014

Strawberry Cupcakes

These cupcakes are perfect to take on a picnic or for a special treat at home. My boys love them!! 

Strawberry Cupcakes

Ingredients
5-6 Large Strawberries chopped very finely.
1 2/3 cup + 1 Tbsp All Purpose Flour
1/4 tsp Baking Soda
1/2 tsp Baking Powder
1 Cup Granulated Sugar
1/2 Cup Butter Melted
1 Large Egg
1/4 Cup Strawberry Yogurt 
3/4 Cup Milk
1 tsp Vanilla Extract

Directions
Preheat oven to 350 degrees F. Line 24 muffin cups with cupcakes liners. Set aside

Chop strawberries very finely. In a medium bowl whisk together flour, baking soda, baking powder, and salt. Set aside. In a large bowl mix melted butter and sugar until combined. Stir in egg, yogurt, milk, and vanilla extract until combined.

Slowly  mix dry ingredients until you have a thick, smooth batter. Fold in strawberries.

Divide batter into you cupcake pan. Note: I was able to get 22 cupcakes from this recipe. You may get more or less depending on how big or small you would like your cupcakes.

Bake at 350 degrees F for 20 minutes or until top of cupcakes spring back when lightly pressed.

Whipped Cream Frosting

Ingredients
1 1/2 Cup Heavy Whipping Cream
2 Tbsp Powdered Sugar
1 1/2 tsp Vanilla Extract
1/3 Cup Strawberry Jam

Directions
Whip cream, sugar, and vanilla together on high speed until you get stiff peaks. Add the strawberry jam and beat for a few more seconds until combined.


Cupcakes should be covered and stored in the refrigerator for up to three days. But, if you're anything like us you'll be lucky if they last one day. :) Please Watch my videos below!!

Enjoy!
xx Emily oo

Monday, April 28, 2014

Chicken, Asparagus, and Bacon Skillet.

Very yummy recipe. Perfect for asparagus season!!

Chicken, Asparagus, and Bacon Skillet

Ingredients 


1 pound asparagus spears

4 slices bacon, coarsely chopped

4 bonless, skinless chicken breast halves or about 12 chicken breast tenders

Salt

Ground black pepper

2 medium summer squash cut in half length wise and sliced.

1 14.5 ounce can chicken broth


2 Tbsp all purpose flour
1 tsp Lemon Juice 
1 Tbsp Lemon Pepper Seasoning
1 Tbsp Dehydrated Onion Flakes (or to taste)
Directions
In a large saucepan cook asparagus in boiling water until preferred doneness. ( I like mine cooked until it falls apart!!) Drain and set aside. ( I added a bit of butter for extra yummyness!!)
In a large skillet cook bacon on medium heat until crispy. Remove bacon and drain on a paper towel lined plate. Add chicken to skillet, sprinkle with salt and pepper, and cook until no longer pink inside. 

Remove chicken from skillet and set aside. Add squash and cook on medium heat until done. In a small bowl whisk together chicken broth, flour, lemon juice, lemon pepper seasoning, and onion flakes. Pour over cooked squash and simmer on medium heat until thick.

Add chicken, asparagus, and bacon to the skillet and cook until warmed through. About 6 minutes.

Serve with your favorite rice.